
Correct bearing installation helps prevent noise, overheating, seizure, and premature failure. Proper mounting procedure, press-fit methods, clean handling, correct fits, alignment, lubrication, and bearing fitting tools reduce damage and improve industrial assembly uptime.
Video Guide: A clear, general demonstration of bearing installation steps and handling practices you can map to most industrial setups.
What is bearing installation and how is it done properly?
Bearing installation is the controlled process of mounting a bearing onto a shaft and/or into a housing while preserving internal geometry, cleanliness, and correct fits. A bearing installation guide standardizes tools, heating/pressing methods, alignment checks, and lubrication so you avoid common bearing installation mistakes that shorten service life.
Video Guide: Shows what improper bearing mounting looks like and why incorrect force and handling damage bearings quickly.
Definition, scope, and what “proper mounting” includes
Bearing installation isn’t simply “getting it on the shaft.” It is a repeatable industrial bearing assembly process that controls four critical variables: fit, force direction, cleanliness, and alignment.
Key elements of a proper bearing mounting procedure include:
- Verification before mounting (part number, internal clearance/preload, seals, lubricant type, shaft/housing tolerances).
- Preparation of mating surfaces (deburr, clean, measure, confirm shoulder radii and chamfers).
- Correct mounting method (press fit bearing installation, thermal mounting, or hydraulic method depending on size and fit).
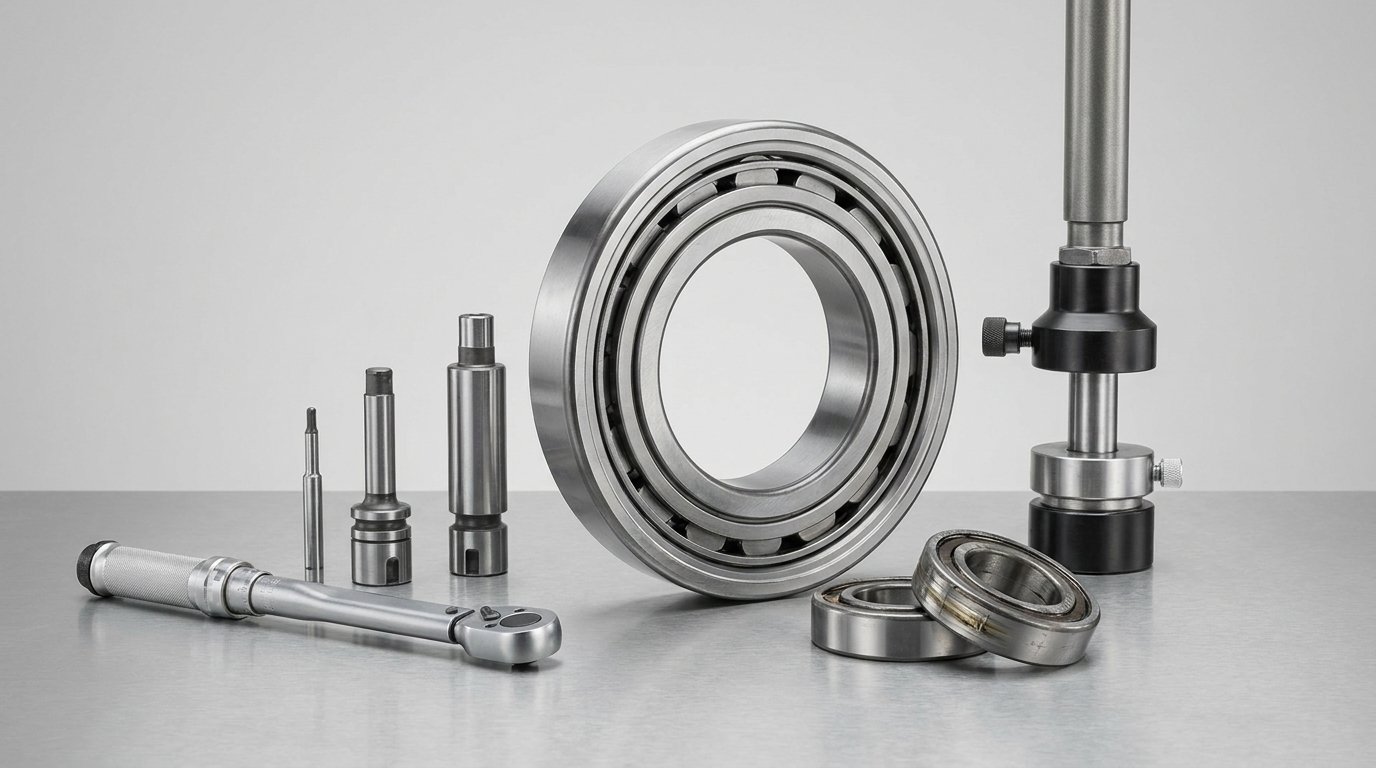
- Use of bearing fitting tools (proper sleeves/press plates/induction heaters; never load through rolling elements).
- Bearing alignment during installation (square start, controlled seating against shoulders, no cocking).
- Post-mount checks (smooth rotation, endplay/axial location, temperature trend, relubrication plan).
Haron Bearing Pro Tip: I treat “installation” as a controlled quality step: if you can’t describe the fit, force path, cleanliness controls, and acceptance checks in one page, the process is not yet stable—and the bearing will pay the price later.
How does proper bearing installation work?
Proper bearing mounting works by applying force or thermal expansion only through the ring that has the interference fit, while keeping the assembly clean and aligned. The process controls fit and seating so internal clearances stay within design limits, preventing raceway dents, skew, preload errors, and early fatigue.
Video Guide: Demonstrates heat-and-cold fitting concepts that reduce press force and help prevent mounting damage.
Force path, fits, and alignment—what actually prevents damage
A bearing survives when you mount it without altering the raceway/rolling-element contact. Most failures trace back to violating the correct force path:
- Interference on shaft (inner ring tight): apply mounting force to the inner ring only.
- Interference in housing (outer ring tight): apply mounting force to the outer ring only.
- Both rings tight (rare but possible): use matched tooling or thermal/hydraulic methods so both rings seat without loading through rolling elements.
A practical “how to install bearings” workflow:
- Confirm fit type (shaft fit, housing fit, temperature conditions, load direction).
- Clean & inspect (lint-free wipe, solvent if needed, no abrasive papers that leave grit).
- Set up tooling (press with correct sleeve, induction heater, or hydraulic nut; torque tools ready).
- Start square (bearing alignment during installation—ensure parallel start to avoid cocking).
- Seat fully (against shaft/housing shoulder; verify no gap).
- Lubricate correctly (right grease/oil, right amount, correct relubrication path).
- Commission (run-in, monitor temperature/noise/vibration).
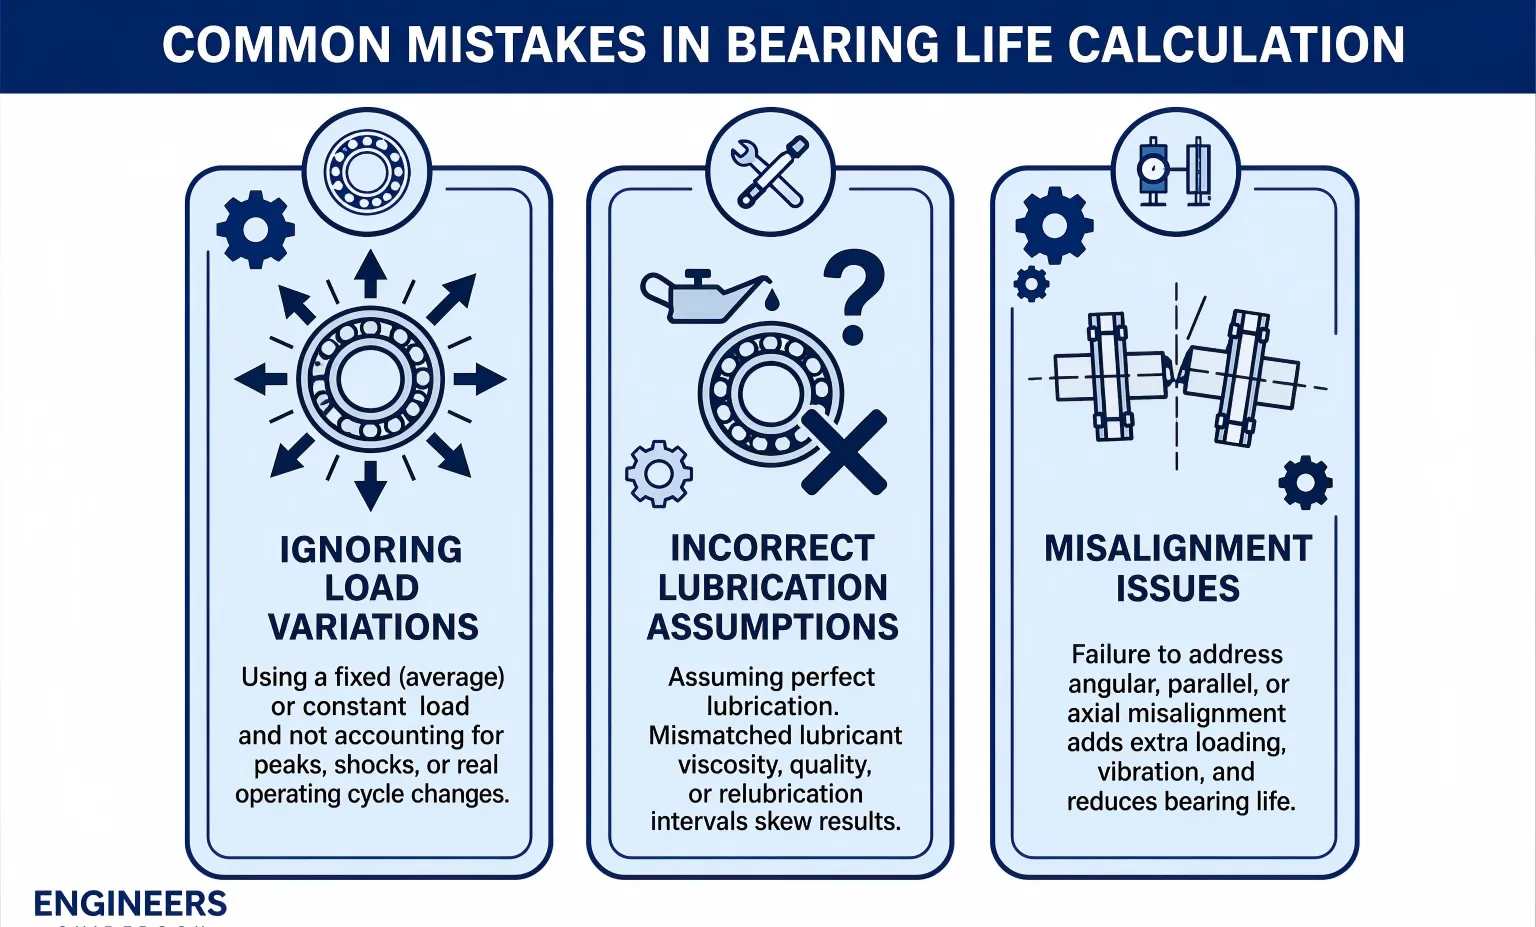
Common installation mistakes and their mechanism:
- Hammering/drifting on the ring: brinelling (permanent dents) → noise and early spalling.
- Pressing through balls/rollers: microscopic raceway damage → rapid fatigue.
- Contamination: particles become indenters → vibration and wear.
- Misalignment/cocking: uneven load → localized overheating and cage damage.
- Overheating during thermal mount: loss of hardness or seal damage → lubrication loss and failure.
Haron Bearing Pro Tip: I always mark the “tight ring” before mounting; it forces the installer to choose a sleeve/press plate that loads the correct ring and avoids silent brinelling that only shows up weeks later.
What are the benefits of proper bearing mounting and installation?
Following bearing installation best practices reduces early-life failures by preventing raceway dents, incorrect preload/clearance, and contamination. You gain longer bearing service life, lower vibration and heat, fewer unplanned shutdowns, and more consistent performance across shifts—especially when standardized bearing fitting tools and acceptance checks are used.
Video Guide: A practical webinar-style overview connecting installation, lubrication, and condition outcomes in real maintenance programs.
Operational and maintenance advantages you can measure
When installation is controlled, reliability improves in ways that show up on the shop floor and in KPIs.
Benefits typically realized from a standardized bearing mounting procedure:
- Longer service life (less early spalling, cage damage, and seal failures).
- Lower vibration (fewer indentations and misalignment-induced harmonics).
- Lower operating temperature (correct fits and lubrication reduce friction).
- Reduced rework time (fewer bearings pulled back off due to wrong seating or damage).
- Predictable lubrication intervals (less grease breakdown from heat or contamination).
- Improved safety (less improvised hammering/heating).
Where the benefits come from—cause-to-effect checklist:
- Correct force path → no brinelling → stable noise/vibration.
- Correct fit and seating → correct internal clearance → controlled heat and load distribution.
- Clean mounting → fewer particle dents → less wear and longer grease life.
- Verified alignment → no edge loading → less cage stress and fewer hotspots.
Haron Bearing Pro Tip: I recommend tracking “infant mortality” failures (0–90 days). If you fix installation errors, that bucket shrinks first—often before you see improvements in long-term fatigue life.
How to maintain bearings properly after installation?
Maintenance for installed bearings centers on correct lubrication, contamination control, and condition monitoring—because most post-installation damage comes from grease mistakes, ingress, or misalignment that worsens over time. Use a documented relubrication plan, keep seals and breathers effective, and trend temperature/vibration to catch issues early.
Video Guide: Highlights common lubrication errors that frequently undo otherwise proper bearing installation work.
Practical maintenance controls that protect your installation work
Even perfect mounting can be undermined by poor lubrication and contamination control. A simple maintenance framework:
- Lubrication discipline
- Use the correct grease type (base oil viscosity, thickener compatibility, additives).
- Set quantity and interval (avoid over-greasing that causes churning/heat).
- Keep grease fittings clean; purge correctly where designed.
- Contamination control
- Inspect seals, labyrinths, and V-rings; replace at first damage.
- Improve breathers and housing cleanliness; prevent washdown ingress.
- Store bearings sealed, dry, and in original packaging until use.
- Condition monitoring
- Trend temperature after installation and after relubrication.
- Trend vibration (overall velocity, bearing defect frequencies when available).
- Listen for new noise; check for abnormal torque/drag.
- Alignment and soft-foot checks (mounted assemblies)
- Confirm coupling alignment and base flatness after thermal stabilization.
- Recheck fastener torque and housing support points.
Maintenance quick-check list (use as a shift routine):
- Grease type matches spec.
- Grease gun is labeled and clean.
- Seals intact; no purge of dirty grease.
- Temperature stable vs baseline.
- No new vibration peaks or audible roughness.
Haron Bearing Pro Tip: I set a baseline temperature and vibration signature within the first hour of commissioning; if those numbers drift after the first relube, it’s usually quantity, contamination, or a relief path that’s blocked—not “bad bearings.”
What factors affect bearing installation cost?
Pricing depends on whether you mean the bearing installation service, the bearing fitting tools, or the cost of failure from poor mounting. Tooling (sleeves, heaters, presses) is usually a one-time capital cost, while installation labor scales with size and accessibility. The best ROI typically comes from avoiding rework and downtime.
Typical cost components and what drives them
Costs usually fall into three buckets: tools, labor, and risk (damage/downtime).
Primary cost drivers:
- Bearing size and fit (heavier interference fits need heaters/hydraulics and more time).
- Accessibility (in-situ installation vs bench assembly).
- Required precision (preload settings, matched bearings, high-speed applications).
- Cleanliness requirements (food-grade, cleanroom-adjacent processes).
- Skill level and documentation (standard work reduces variability and rework).
A practical checklist to estimate what you’ll pay for:
- Bearing fitting tools: press sleeves/plates, induction heater, hydraulic nut, pullers, torque wrench.
- Consumables: solvents, wipes, gloves, anti-fretting paste (if specified), grease/oil.
- Measurement: micrometers, bore gauges, thermometers/IR camera, feeler gauges.
- Quality: time for inspection, recording fits, and acceptance checks.
Haron Bearing Pro Tip: I budget tooling against the cost of one avoided failure. If a single shutdown costs more than an induction heater, the heater is not an expense—it’s insurance that also standardizes your press fit bearing installation quality.
Key Features & Comparison
A robust bearing installation approach combines controlled force application, clean handling, correct fits, and verified bearing alignment during installation. The “best” method depends on bearing size, interference level, and accessibility. Standardizing bearing mounting procedure and tools prevents repeatable mistakes and improves consistency across technicians and sites.
Method selection at a glance
Based on our internal data and market analysis, here is the breakdown:
| Installation method | Best for | Key bearing installation best practices | Common bearing installation mistakes | Typical risk level |
|---|---|---|---|---|
| Press fit (mechanical press + sleeves) | Small–medium bearings, controlled bench work | Load only the tight ring; use correct bearing fitting tools; start square; verify seating | Pressing through rolling elements; cocking; uncontrolled force | Medium if tooling is wrong |
| Thermal mounting (induction heater/hot plate + temp control) | Medium–large bearings with tight shaft fits | Heat within manufacturer limits; keep clean; move quickly; confirm shoulder contact | Overheating; handling burns/contamination; delayed seating | Low–Medium with discipline |
| Hydraulic nut / oil injection (where applicable) | Large bearings, heavy interference fits | Controlled pressure; measured axial drive-up; documentation | Wrong pressure/drive-up; leakage; poor cleanliness | Medium |
| “Impact” methods (hammer & drift) | Emergency-only, low-criticality | Avoid whenever possible; if unavoidable, use soft-face + ring-only tools | Brinelling, cracked rings, seal damage | High |
Haron Bearing Pro Tip: I standardize two tool kits: a “press kit” with ring-specific sleeves and a “clean kit” (wipes, caps, gloves). The clean kit prevents more failures than most people expect.
Cost & Buying Factors
Choosing how to avoid bearing damage is mostly a purchasing and process decision: buy the right bearing, the right tools, and the right controls for your environment. For most plants, the biggest hidden cost is not the bearing—it’s the downtime and collateral damage caused by installation mistakes.
Key buying factors to evaluate:
- Application criticality: high-speed, high-load, or safety-critical equipment justifies induction heating and documented fit checks.
- Standardization across bearing sizes: choose bearing fitting tools that cover your common ID/OD range.
- Environment: wet/dusty environments need stronger contamination control and sealing strategy.
- Skill availability: if turnover is high, invest in foolproof tooling and visual work instructions.
- Measurement capability: fit verification requires gauges; without them, installation becomes guesswork.
A practical purchasing short list:
- Induction heater with temperature control and yokes sized for your common bearings.
- Press sleeves/installation bushings that contact only the correct ring.
- Basic metrology (micrometers/bore gauge) and documentation forms.
- Lubrication control (labeled guns, correct fittings, compatible grease).
Conclusion
Most premature bearing failures come from installation process errors, not defects. A proper bearing mounting procedure, fitting tools, clean handling, correct fits, lubrication, and alignment help protect service life. Haron Bearing supports installation methods and tooling selection.